


Test Machine (Mac) Setup
The automation setup for iOS involves more steps along with different tools. Below mentioned are the tools required for Appium set up in MAC Machine
- MAC OS(10.12.6) - ( Minimum version)
- JDK (Java Development Kit)
- Eclipse (IDE)
- Appium (Any latest version)
- Appium Java client jar(4.1.2)
- IOS Device (10.3) (Minimum requirement)
- Xcode (9.1)
- Node v. 4 or above.
Java Installation:
- Download, install and configure Java JDK
- Set the JAVA_HOME system variable On Mac, we need to update the bash_profile file with JAVA_HOME and PATH variables. The steps are below.
vim ~/.bash_profile
Include the following content into the file

export M2_HOME=${HOME}/Lib/apache-maven-3.3.9
export PATH=$PATH:$M2_HOME/bin
export JAVA_HOME=/Library/Java/JavaVirtualMachines/jdk1.8.0_102.jdk/Contents/Home
export PATH=${JAVA_HOME}/bin:$PATH
export ANDROID_HOME=$HOME/Library/Android/sdk
export PATH=${PATH}:$ANDROID_HOME/tools:$ANDROID_HOME/platformtools
export PATH=/usr/local/bin:$path
export PATH=/usr/local/git/bin:/usr/bin:/usr/local/sbin:$PATH
- Save the file
<Esc> :wq - Source your bash or zsh profile file after adding/saving to take the effect of updating the bash profile.
source ~/.bash_profile
Test the Setup
echo $JAVA_HOMEOutput:/Library/Java/JavaVirtualMachines/jdk1.8.0_102.jdk/Contents/Home- Verify the Java version by typing
java -versionon terminal
If bash_profile does not exist on your machine follow the steps below
- create a new bash_profile file by typing in terminal >
touch ~./bash_profile- As mentioned above, you can also use vi or vim editor for creating/updating the bash_profile
Procedure to install Homebrew, Node & NPM through the terminal
Step:1 Install Ruby, Homebrew
First, install Homebrew by typing below command in terminal:
ruby -e "$(curl -fsSL https://raw.githubusercontent.com/Homebrew/install/master/install)"
Note:- Before Running Above command ensure ruby is installed in your system
Then, run the brew update to ensure your Homebrew is up to date.
brew update
To validate the Brew installation, run brew doctor and follow the proposed recommendations from brew doctor.
brew doctor
Adding Homebrew to the $PATH:
export PATH=/usr/local/bin:$PATH
On Mac, the bash or zsh profile file should be updated by adding the above line & saving the bash profile file. But, to take the effect of updating the bash profile, we need to source the file with the below CMD.
source ~/.bash_profile
Step:2 Install Node
npm will be installed with node by typing below command in terminal:
brew install node
Step 3: Install APPIUM
Install Appium through the terminal by typing below command, the latest version of appium will be installed
npm install -g appium
Step 4: Install WebDriver
Now also run below command ( It might ask Sudo permission)
npm install wd
Note: Might need to sudo for the above cmd if the current user is not root user; but, Appium might not function correctly if it is sudo used. Need rerun above installations as a non-root user. If you had to install Appium using
sudo npm install -g appium, the solution is to reinstall Node using Homebrew, which doesn't require sudo to install global npm packages.
Other Dependencies:
Run below commands in terminal to install other important dependencies.
iOS deploy
Install and debug iOS apps from the command line. Designed to work on un-jailbroken devices.
npm install -g ios-deploy
or
brew install ios-deploy
libimobiledevice
A cross-platform software protocol library and tools to communicate with iOS® devices natively.
brew install libimobiledevice --HEAD
Carthage
Decentralized dependency manager for Cocoa
brew install carthage
Other mandatory Steps
First, locate where appium is installed it would usually be located in Applications
Open Terminal and navigate to WebDriverAgent in Appium directory folder (Right-click on Appium.app > Show Package Contents > Contents > Resources > app > node_modules > appium > node_modules > appium-xcuitest-driver > WebDriverAgent > )
Enter the following command to initialize WebDriverAgent project:
mkdir -p Resources/WebDriverAgent.bundle
sh ./Scripts/bootstrap.sh -d
Code Signing with WebDriverAgent App:
Pre-requisites:
iOS developer account to be updated in Xcode as given below
- Open Xcode
- Under the XCode, menu select "Preferences"
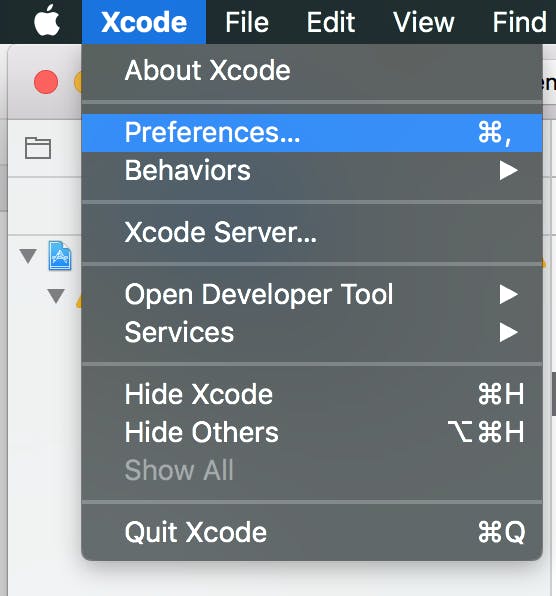
- Under Accounts tab click on + at the bottom left corner
- Select Apple ID and hit on Continue.
- Provide the Developers ID and Password (Make sure these are exactly the same credentials used for signing the App under test)
- Once the developer ID is added to the list under Accounts, close the Preferences window.
Code Signing Process:
- Locate the Appium installation folder. It would usually be present in Applications,
- Navigate to the below path
/Applications/Appium.app/Contents/Resources/app/node_modules/appium/node_modules/appium-xcuitest-driver/WebDriverAgent - To navigate to the above path go to Applications -> Right-click on Appium -> click on
Show Package Contentsand navigate to the above path - Double click and open XCode project:
WebDriverAgent.xcodeproj - Select
WebDriverAgentLib, and in the Signing section, check Automatically manage to sign and select a team.

- Then on Xcode’s menu bar, select Product > Build
- Repeat the last two steps for
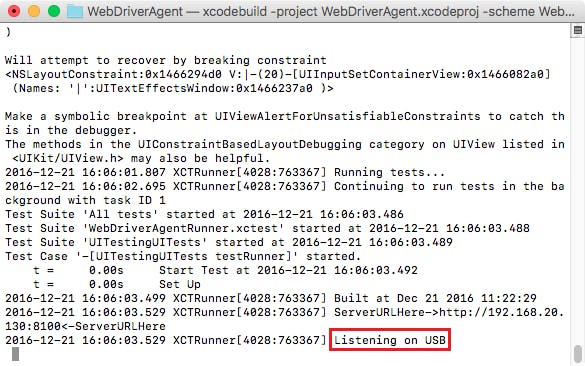
WebDriverAgentRunneras well. - Build WebDriverAgent to verify whether the steps above works or not
xcodebuild -project WebDriverAgent.xcodeproj -scheme WebDriverAgentRunner -destination 'id=<udid>' test
Note: <udid> is the device UDID of your mobile device.
- You should be able to see Listening on USB in the build output as below
Eclipse setup
- Download Eclipse and extract Eclipse to a folder and open the Eclipse application.
- Download below Jar's
- Selenium Selenium Standalone server jar
- TestNG - Add from Eclipse marketplace
- gson
- Java-client jar
In Eclipse, create a java project as shown below:
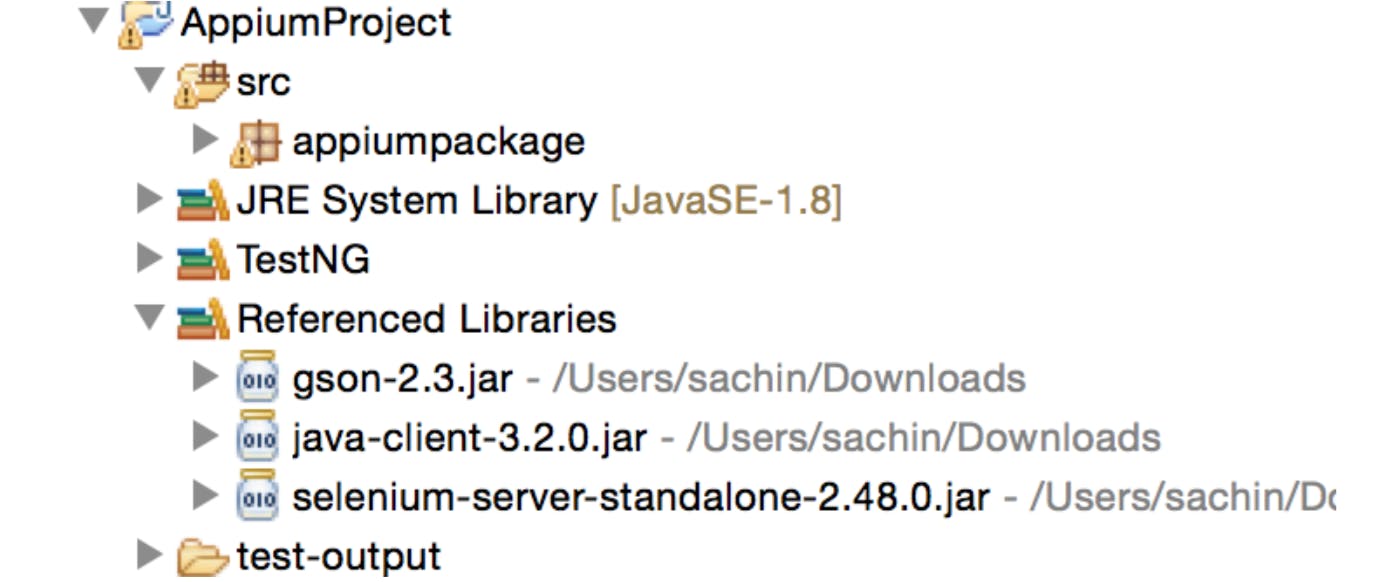
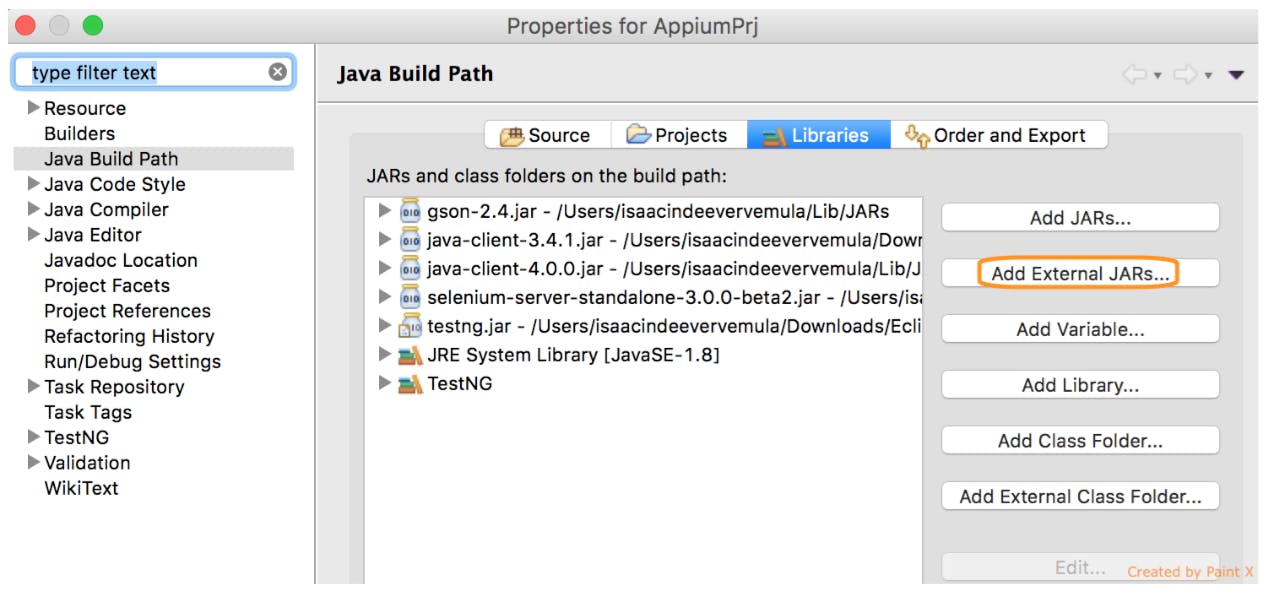
- Configure the downloaded Jar's in Eclipse via Build Path by Right-clicking on the project and configure Build Path as shown below
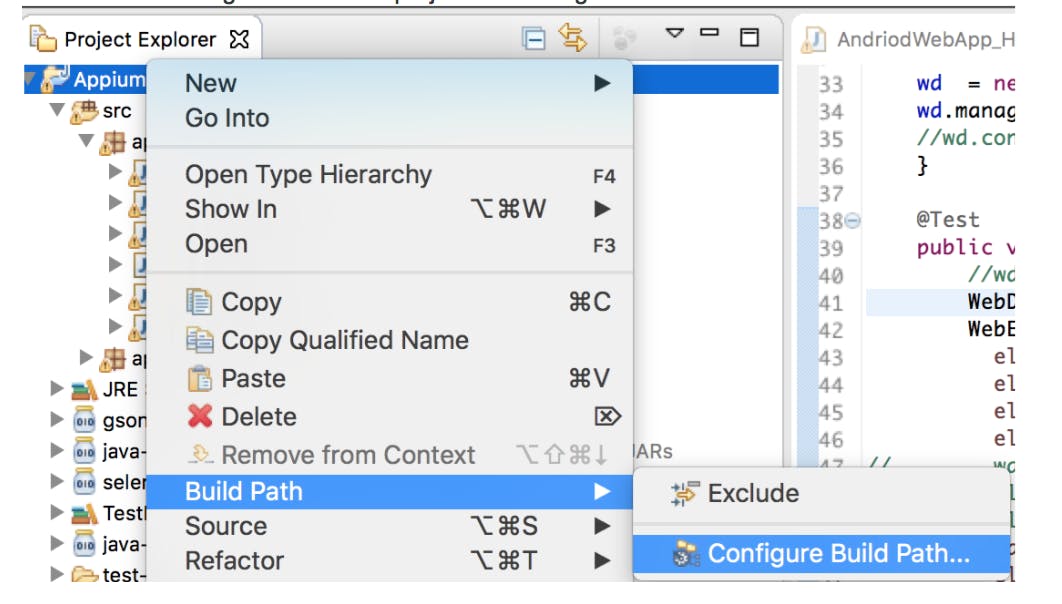
- Add all the previously downloaded jar files
Install ADT Plugin
it can be installed from Link(so that eclipse also recognizes android-device) (in eclipse >> Help >> Install New Software >> enter the URL: https://dl-ssl.google.com/android/eclipse)
Error's that you may face while running your Automation script:-
Error 1: Unknown udid
- You may get this error even if you have entered correct udid as well this is because the corresponding library which talks to protocols of iPhone may have not got installed, resolve this error by installing libimobiledevice
To resolve this issue, just type below command in terminal
brew install libimobiledevice --HEAD
Error 2: Could not initialize ios deploy
run below command in terminal and install ios display
npm install -g ios-deploy
incase if you face any errors while running above commands please use below mentioned command
npm install -g ios-deploy --unsafe-perm=true
Error 3:- carthage not found
run below command in terminal and install carthage
brew install carthage
Error 4:- error code 65
- First, locate where appium is installed it would usually be located in Applications,
- Navigate to below path
/Applications/Appium.app/Contents/Resources/app/node_modules/appium/node_modules/appium-xcuitest-driver/WebDriverAgentRight-click on Appium -> click on "Show Package Contents" and navigate to the above path - Double click and open XCode project:
WebDriverAgent.xcodeproj. - Before you start code signing, ensure that you have added any of the ios developer accounts in XCode
- To add account follow these steps click on XCode option on top left corner --> click on preferences option --> click on Accounts tab -->click on + icon & enter the developer's email & password to sign in.
- 2 folders
WebDriverAgentRunner WebDriverAgentRunner - Now first select
WebDriverAgentRunner, go to Tab "General" under Signing section select Team as<Your Team Name>, then go to the tab "Build settings" find field "Product Bundle Identifier" by scrolling down and edit this field as<app bundle id> - Repeat the previous steps for the remaining 5 folders
- Now click the play button, once the build gets Succeded you are ready for your next test run, if it displays the message "Build Failed" then you have not edited the above section's in "General" & "Build Settings" tab correctly.
- Now start the Appium server freshly
- And Run your java program i.e. (mobile.java),you will notice that error code 65 is no more appearing and you would able to launch your app successfully.
Apart from the above instructions, if error code 65 still persists, follow the below set of instructions: Use the xcodeOrgId and xcodeSigningId desired capabilities:
{
     "xcodeOrgId": "<Team ID>",
      "xcodeSigningId": "iPhone Developer"
  }
Note: Team ID is a unique 10-character string generated by Apple that is assigned to your team
If you still encounter the error as below
ERROR: [MJSONWP] Encountered internal error running command: Error: Unable to launch WebDriverAgent because of xcodebuild failure: "xcodebuild failed with code 65". Make sure you follow the tutorial at https://github.com/appium/appium-xcuitest-driver/blob/master/docs/real-device-config.md. Try to remove the WebDriverAgentRunner application from the device if it is installed and reboot the device.
- To confirm the diagnosis of this error open Keychain Access app > Certificates "Category" and individually select each of the above certificates taking note of the status in the header pane. A Green Circle with White Checkmark indicates a healthy certificate, while a Blue Circle with White Plus sign indicates an unhealthy certificate and cause of the error.
Use the following steps to troubleshoot the issue -
- Ensure that Apple Inc. Root Certificate is installed in your keychain. If not, it can be downloaded here
Ensure the Apple Worldwide Developer Relations Certification Authority certificate is installed in your keychain. If not, it can be downloaded from the bottom link on the Provisioning Portal website > Certificates tab.
First, try and restore Trust settings to the proper value "Use System Defaults". To do that, double click on that certificate to expand the Trust section, and select "Use System Defaults". If after doing that the Blue Circle with White Plus sign does not automatically change to a Green Circle with White Checkmark, the problem is not yet fixed and you'll need to continue to the following step to resolve the issue.
Some Additional Points
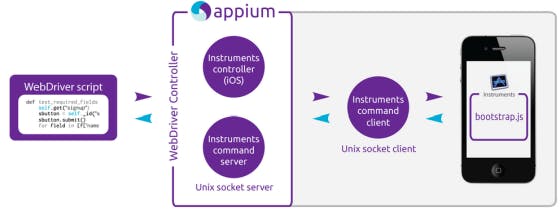
Appium: Mobile Automation tool
Appium is an HTTP server which was written in node.js, it’s architecture is as same as Selenium Webdriver Server. Receiving requests from the client libraries Executes the commands on the target devices & emulators Responds with an HTTP response.
Desired Capabilities:
Below mentioned are the desired capabilities which are required to set to start an automation session on iPhone Device
       {
              "platformName": "iOS",

             "platformVersion": "11.0",    (specify any version in which you want to execute your scripts)

             "deviceName": "iPhone 7",  (specify any device name in which you want to execute your scripts)

             "automationName": "XCUITest",

             "app": "/path/to/my.app"

             "udid": "fc1650f37d318a2b3c0399db133ff76209c5a6bc"
      }
There are many other desired capabilities which are specific to only IOS & Android which would be used based on the requirement
Hybrid App
For hybrid or web tests, you will also need to follow the ios-webkit-debug-proxy setup instructions
Refer the link for Android appium setup